
I have been bathroom remodeling in Dallas and the surrounding areas for over 19 years.
In that time, customers have asked me how to remodel their bathroom since most don’t know where to begin!
So I decided to put together this little guide to answer your most common queries, no matter where you live!
That way, you also see the process involved in remodeling your bathroom from start to finish. I’ve included a video afterward so you can see it all come together.
Always check with your city and contractor to make sure the right permit/s is pulled, and be very wary of those who tell you, “you don’t need a permit!”. If you are moving plumbing or electrical lines/circuits, introducing new ones, and/or changing the overall original plumbing/electrical setup, you need a permit.
Assuming it’s done, the first thing you want to do before hiring anyone or tearing anything out is pick out your products!
Such things as tile and mosaics, faucets, sinks, tubs, lighting, etc., should be at your home beforehand.
Try to get these from one place as it’s a whole lot easier to keep track of your purchases when it’s from a one-stop shop. Here are the two best stores I’ve worked with for many years for bathroom remodel projects:
 |  | |
|---|---|---|
| Pricing | Good | Very Good |
| Price Matching | No | Yes |
| Free Shipping | Yes | Yes |
| Product Selection | Huge | Very Large |
| Service | Excellent | Excellent |
| Overall | Excellent | Excellent |
| Availability |
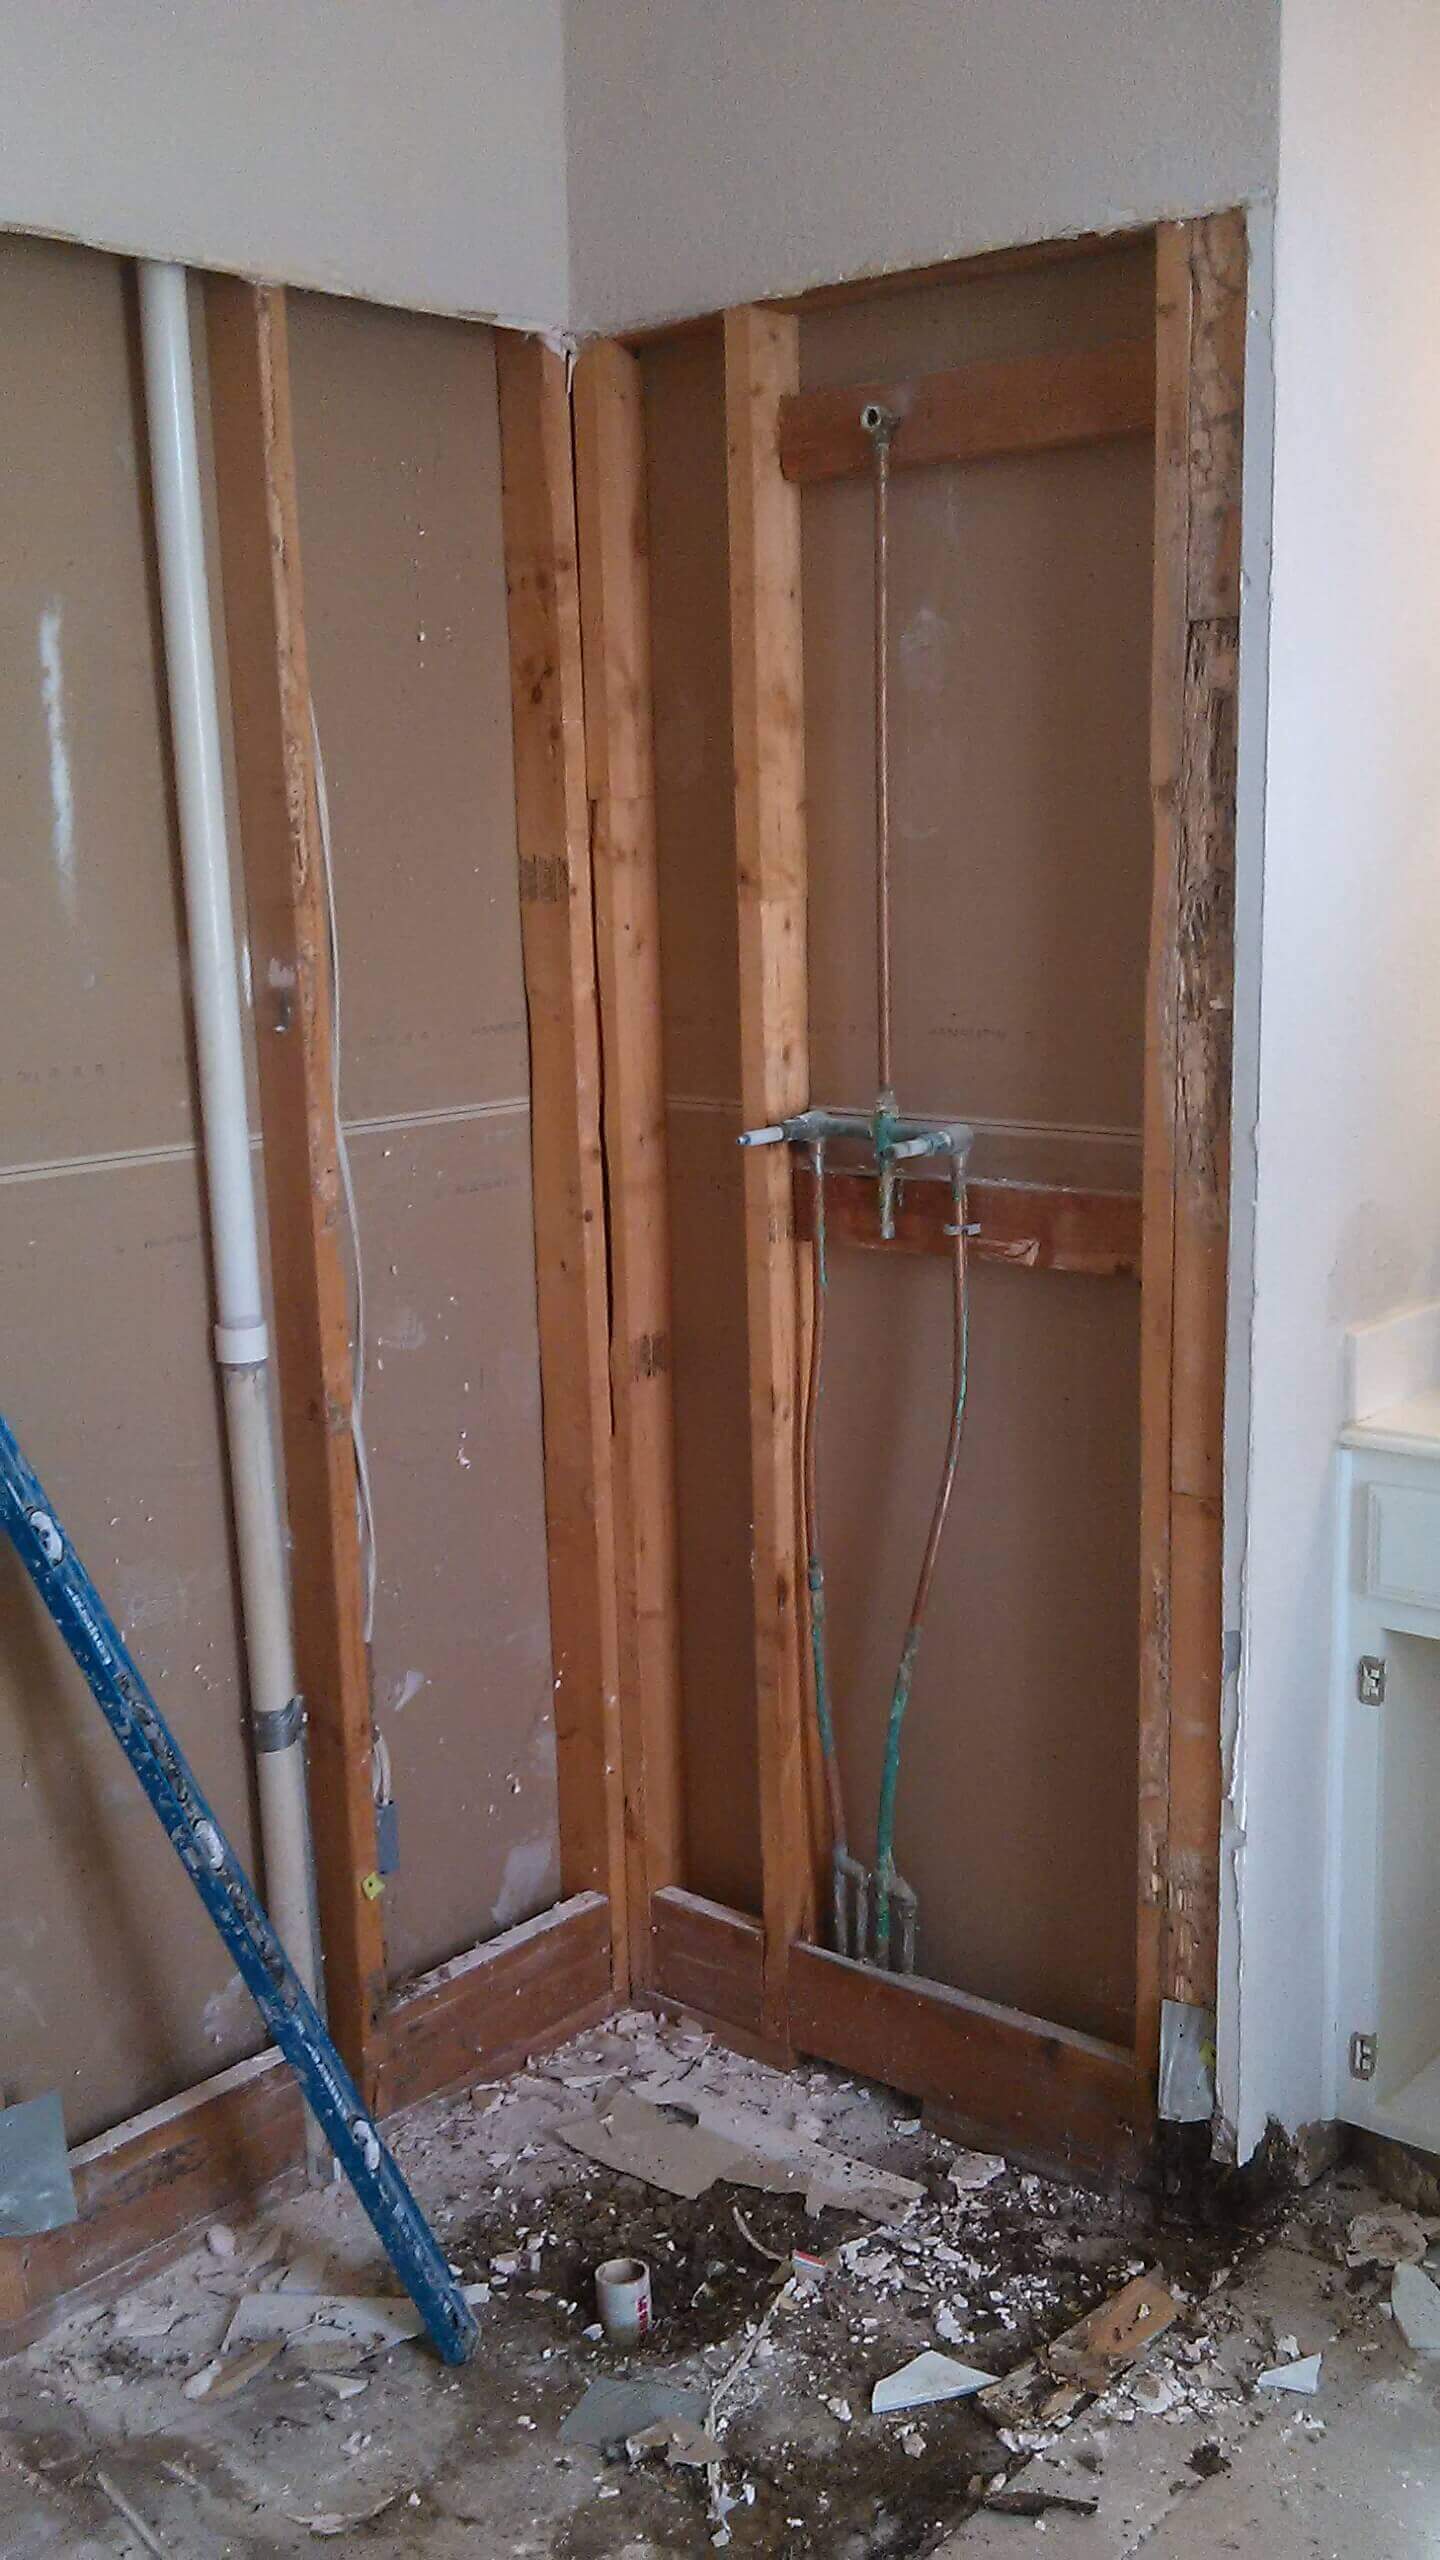
OK, the first step is the demolition process.
Depending on what you need to be done, whether it’s just the shower or the whole bathroom, demolition can range from just tearing out the shower walls to stripping the entire bathroom.
That’s when all of the old flooring, walls, sheetrock, cabinets, and even tubs and fixtures come out.
The goal at this stage is to rip out what’s not going to be needed for the future bathroom.
It also allows you to examine any damage behind your walls that you may not have been aware of. We often find damaged 2 x 4’s and water damage to many parts of the wall/s and/or shower pan once tear-out is complete.
This is important because you can actually see the damage before repairs are done.
Stage two is to get your plumbing and electrical work squared away.
This usually involves roughing in your shower valve and any other required plumbing like body sprayers and so forth.
The plumber will have to return later for some final finish out work.
However, their initial visit is to complete all plumbing that goes behind your walls. This includes running new lines or rerouting them if any fixtures need to be moved, such as commodes, vanities, etc.
The electrician at this stage can run their wires if you want to install lighting such as cans, and it also allows them to examine your existing wiring.
I’ve lost count of the number of times we uncovered faulty wires, poor workmanship, and even outright hazards.
One of the most common problems we ran across was previous contractors “backstabbing” wires into the back of switches instead of securely wrapping them around.
This is also a chance to have your GFI looked at, as every bathroom must have one according to code.
Anything relating to plumbing and electrical that goes behind your walls is done at this point.
Depending on your city, this is the time to call out the inspectors for a plumbing and electrical rough-in inspection. They want to make sure the work is performed right and up to proper building standards.
So far, you can see how methodical the process is.
It allows you to check as you go if something needs attention, whether during the demolition, plumbing, or electrical phase.
That way, you will always know what is going on before the next stage.
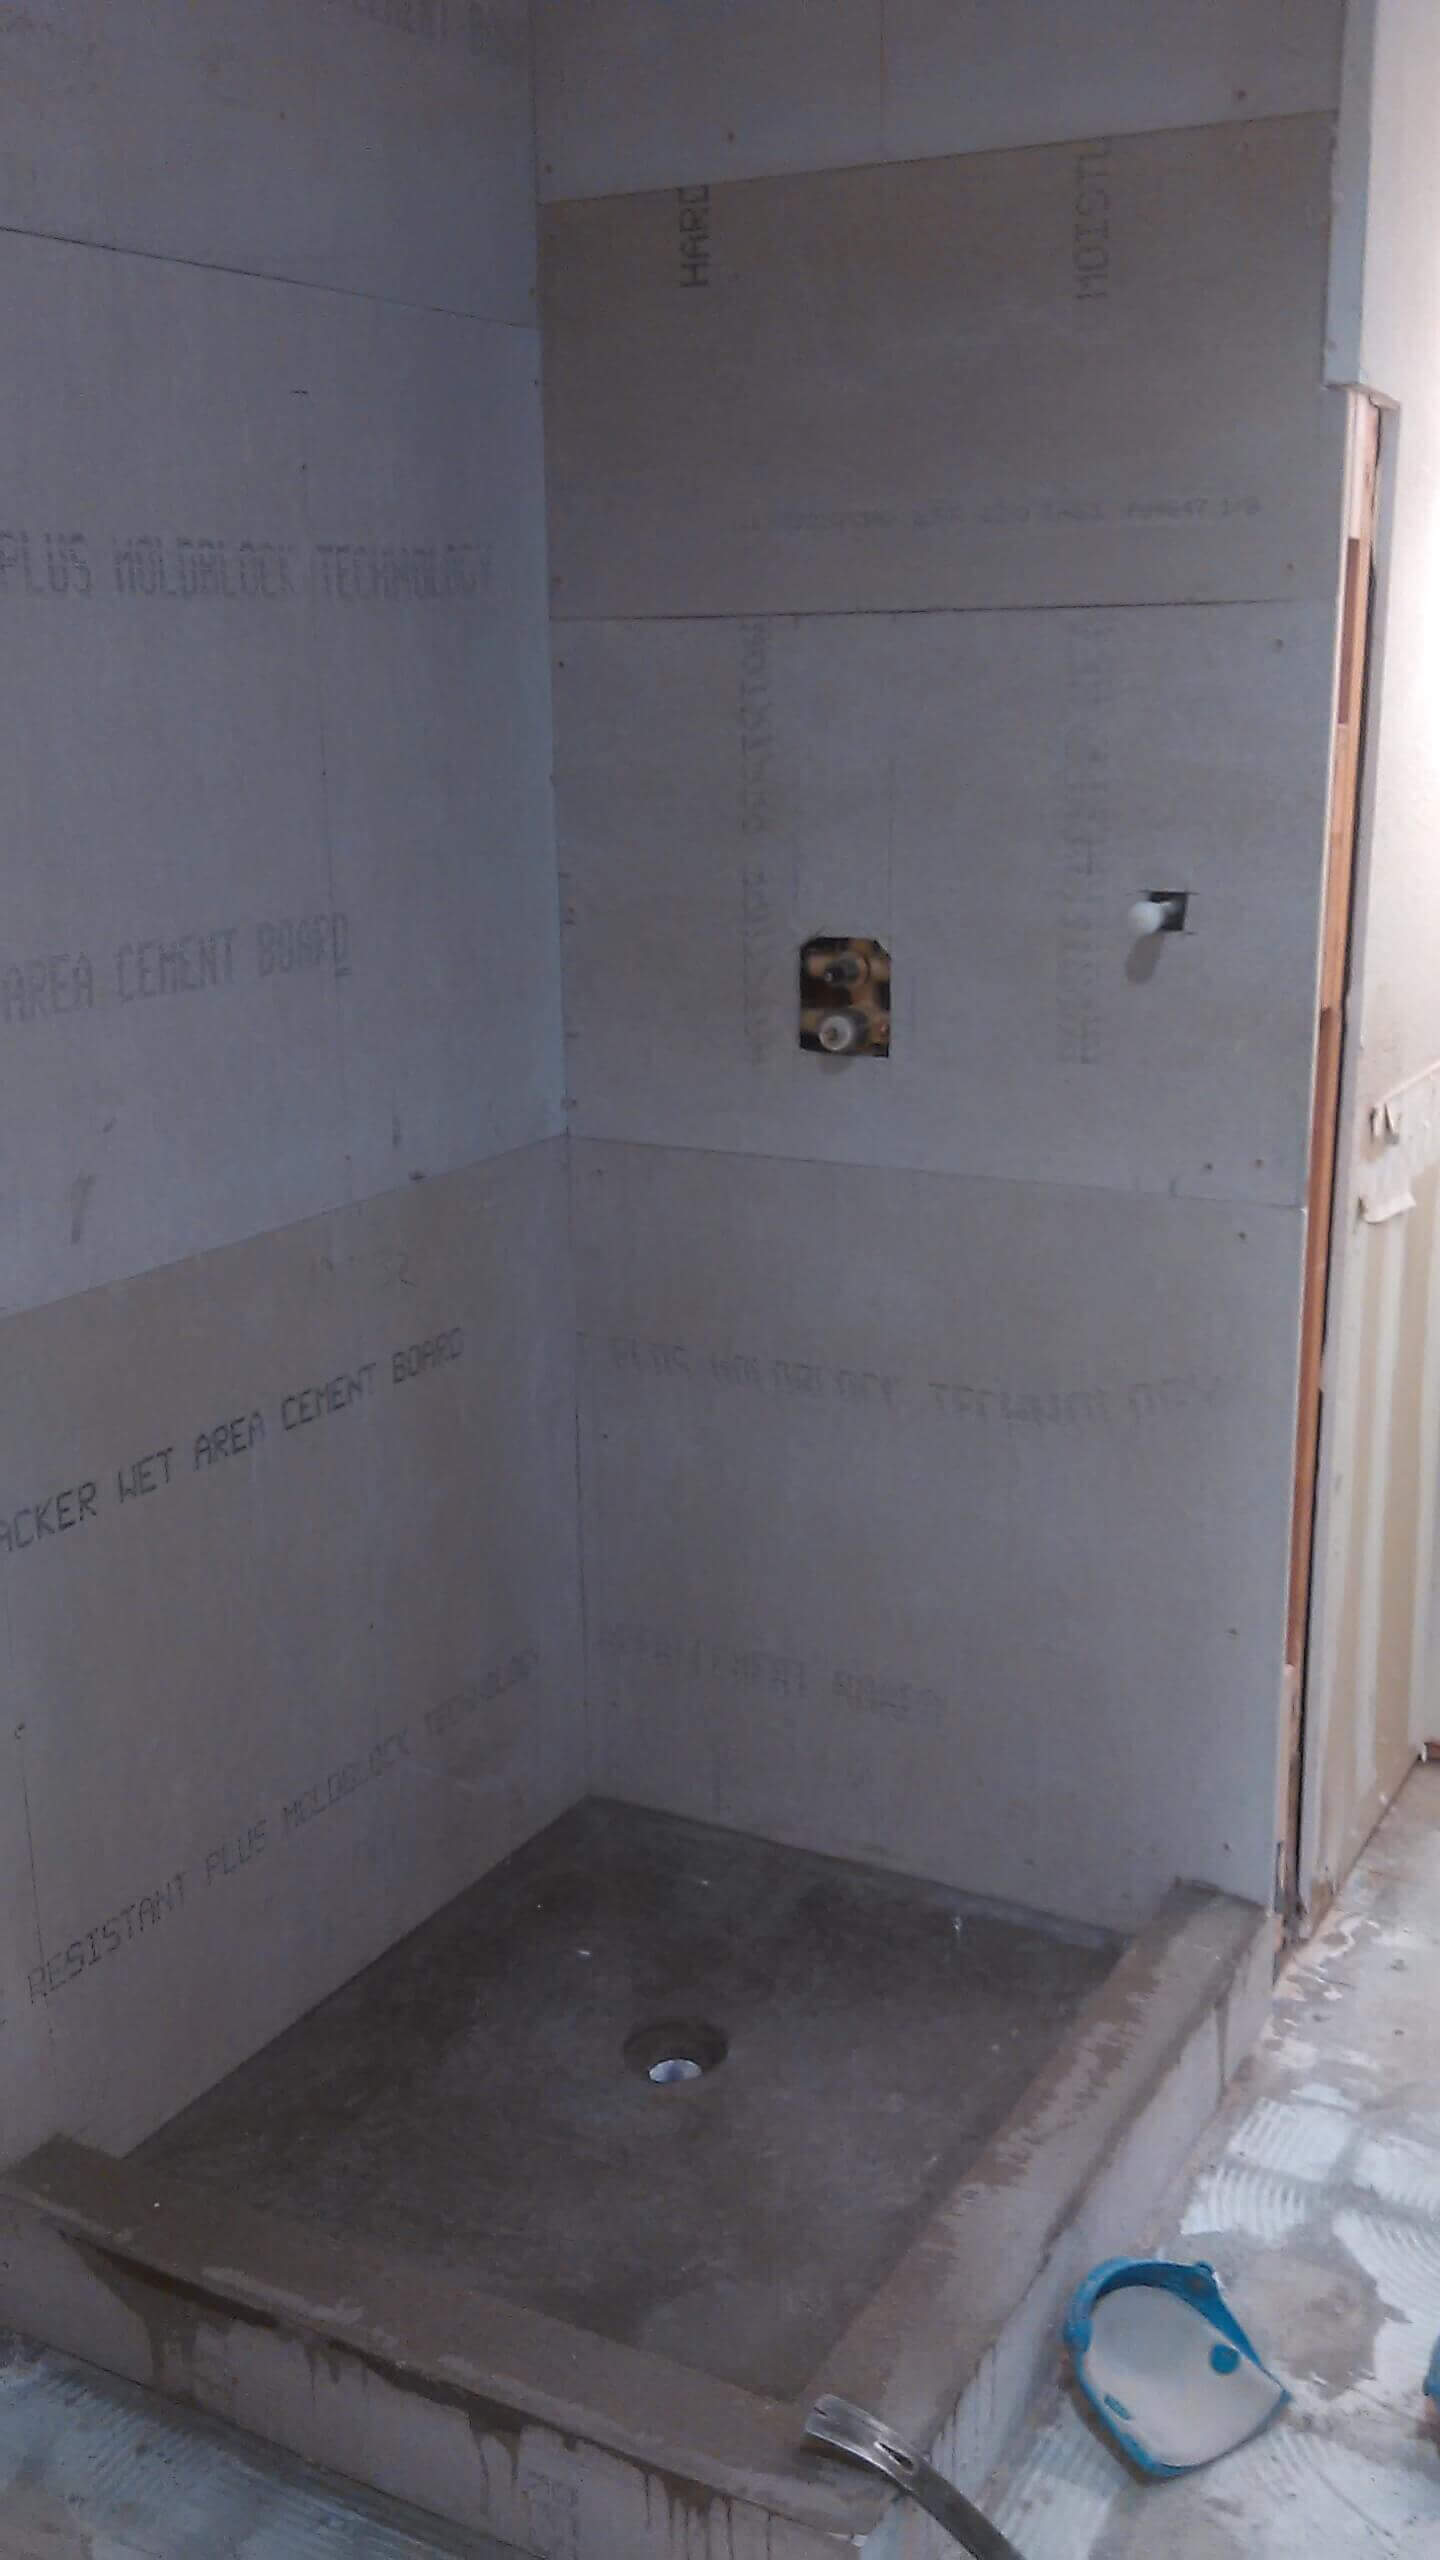
Ok, please pay particularly close attention here as this is very important: After your plumbing and electrical are done, and the backer board goes up, this is when the shower walls need to be waterproofed.
There are many ways to do this, but the most common here is to apply two coats of a roll-on membrane, making sure the gaps between the boards are sealed, then seam taping them and the corners.
When the shampoo niche is cut out, waterproof it the same way.
Make sure either you or your contractor has this waterproof membrane. Once dried, you start building the shower unit and/or tile the floor, depending on the installer.
Before tiling the bathroom floor, consider a crack isolation membrane instead of hardiboard on your subfloor if your bathroom is upstairs and/or your home is prone to shifting or foundation movement.
They help stop tile from cracking during minor movements.
Since this is when your shower starts coming together, it’s important to let the installer know what sort of setup you would like.
For example, please go over the dimensions to make sure it’s exactly as you want it.
Point out where you would like the soap niche/s (aka built-in shampoo boxes), steps, bench, and details of this nature.
It would be best if you also finalized the direction of the tile. Do you like it straight, on a diagonal, offset, or custom pattern?
Once this has been figured out, a competent installer will start building the shower pan, ensuring to use the correct liner and run it high enough up the wall for future moisture protection.
Most importantly, though, they float the pan with concrete and get the angles right. If they use concrete as the base of your pan to float (hardly anyone uses acrylic/ cheap builder’s grade materials anymore), it will need 12-24 hours to dry.
Then they will return to continue the rest of the work.
While this is drying, they have some time to take care of any other minor construction you need in your bathroom, like a pony wall or frame for a drop-in tub.
Once the shower pan dries, they return to tile the walls, put in the shampoo niches, tile the shower pan, and ensure the edges have the correct finishing with bullnose.
Something to keep in mind is not all tile comes with coordinating bullnose pieces.
If the installer is experienced, however, and knows what they are doing, they should be able to fashion bullnose pieces out of the existing tile, providing it is either stone or porcelain.
Once the shower unit is completed tile-wise, they should bring the shower glass contractor to measure for the unit as this takes between 7 to 10 days from the order date to install. That way, you have a head start, so it can be installed right after everything else is done.
This, of course, will depend on what you’re looking to get done.
You may need a fresh coat of paint, or you may need all of the sheetrock replaced.
Now, if you are getting your whole room’s sheetrock replaced, make sure the insulation is to your satisfaction.
In bathrooms where it can get colder than other rooms, good insulation is important. This is the stage to replace it.
Once the sheetrock goes in, the painter/s will tape and bed it and complete all of their wall prep before painting. Be sure to specify what sort of texture (if any) you want on the walls before painting.
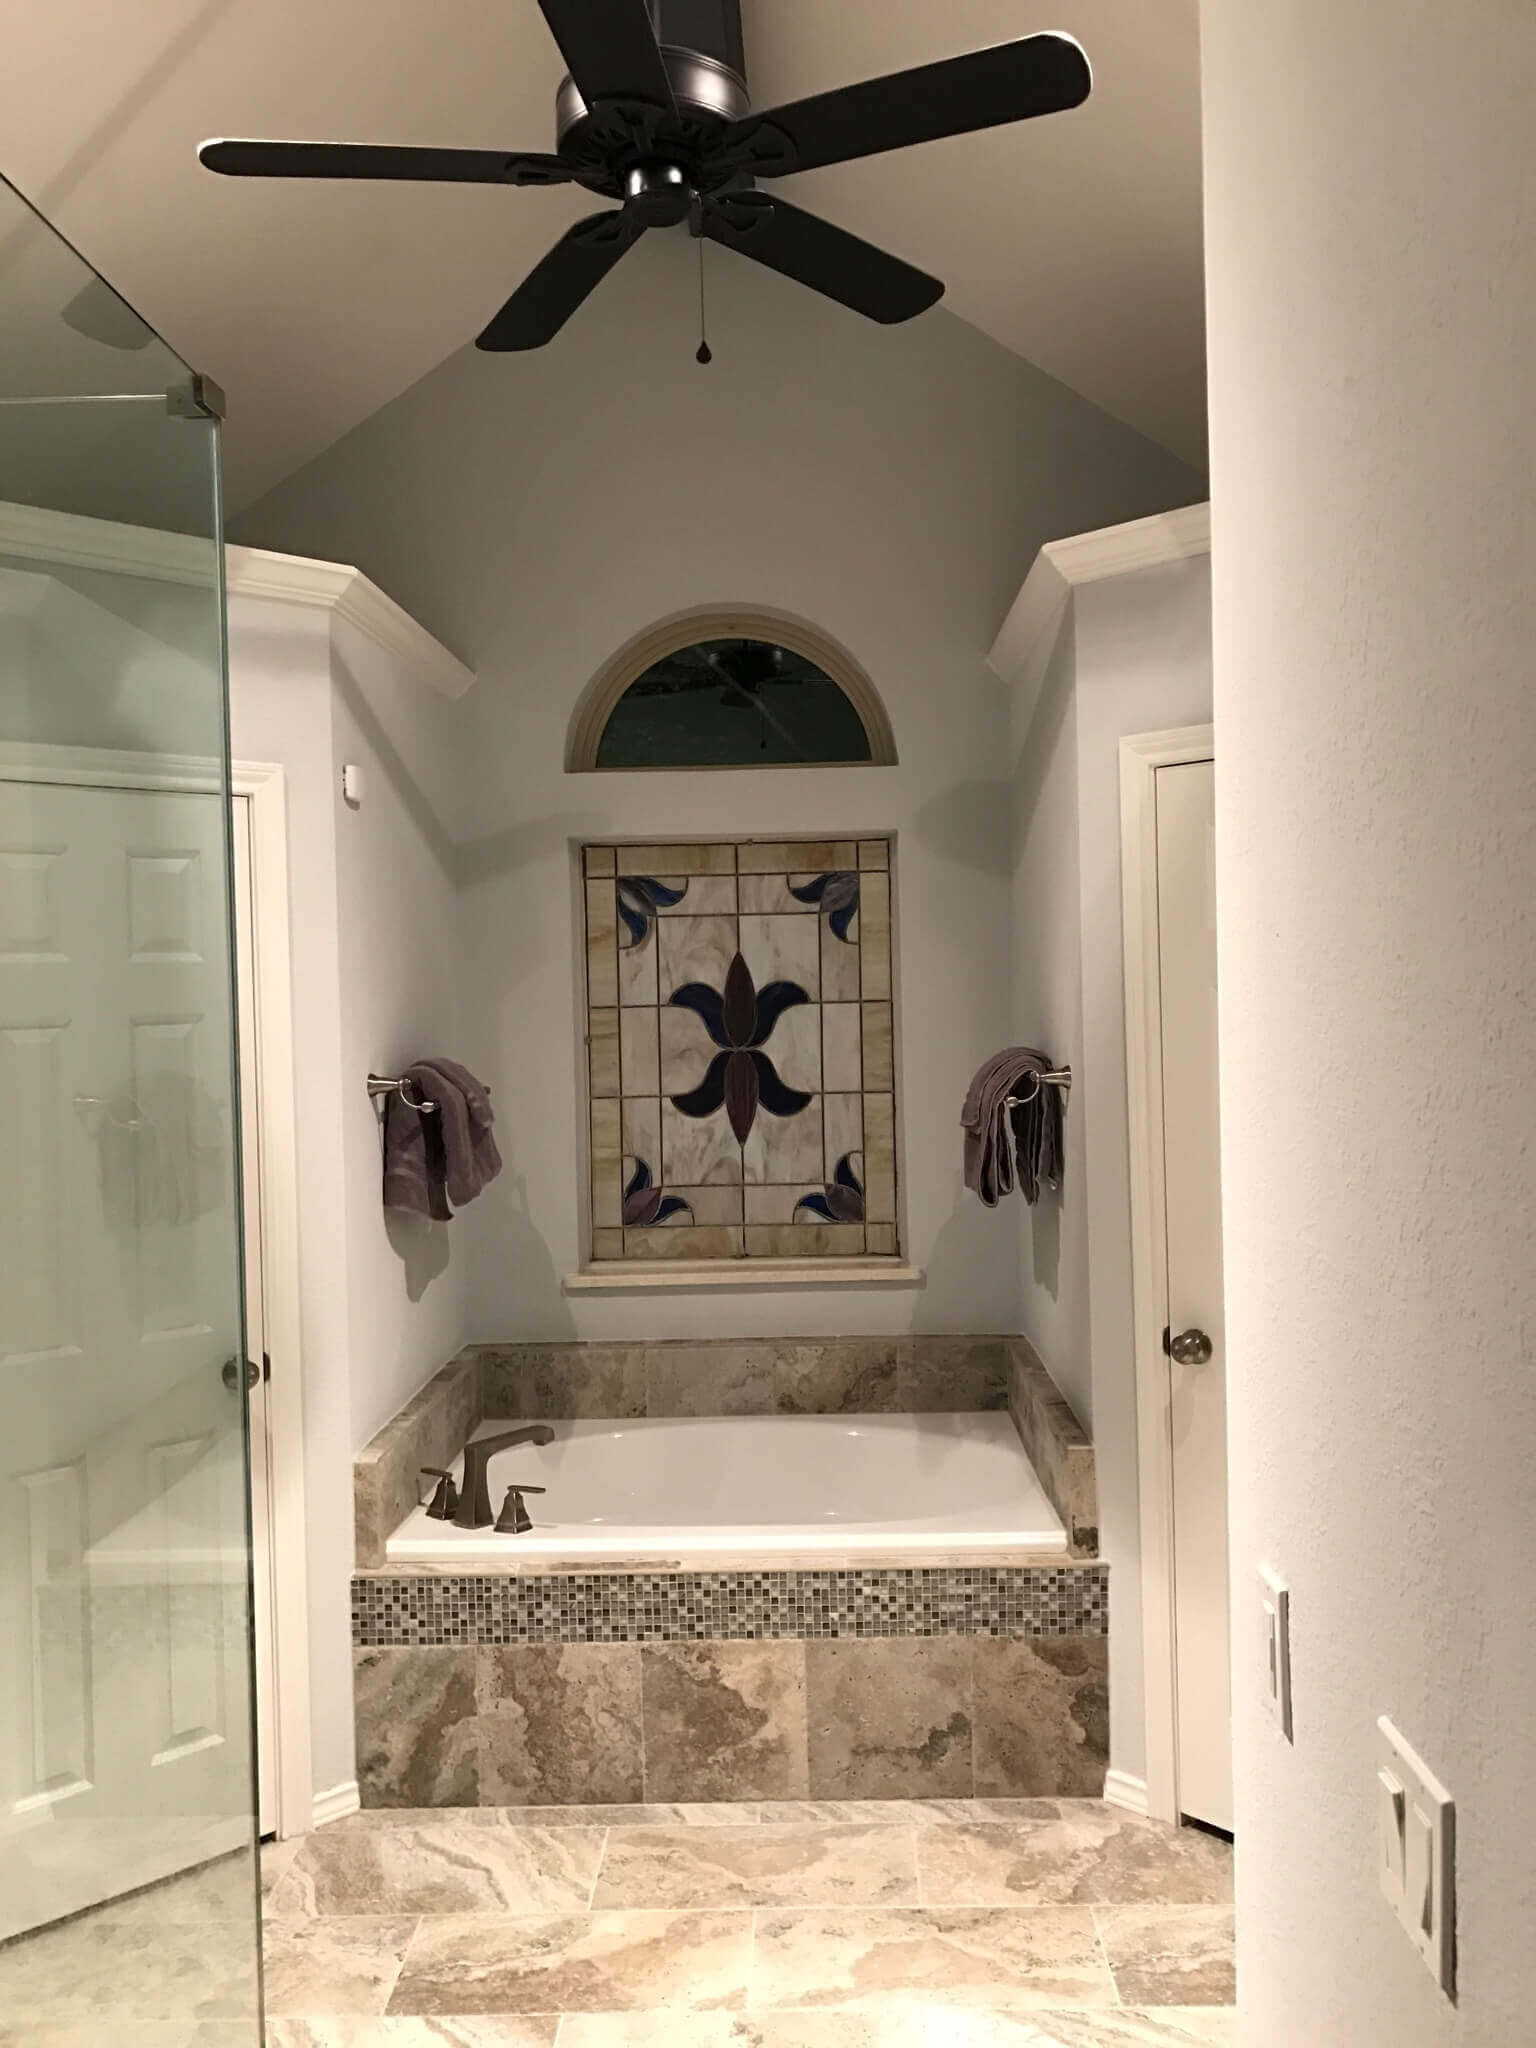
So up until this point, we have all the demolition, electrical, plumbing, and shower work done.
Now the rest of the bathroom really starts coming together!
*The next phase is a matter of taste because some people like to leave the painting to dead last since they want behind the vanities, mirrors, and anything else to be painted; others do not care so much.
Whether you paint before the vanities go in or after, some minor items need attention:
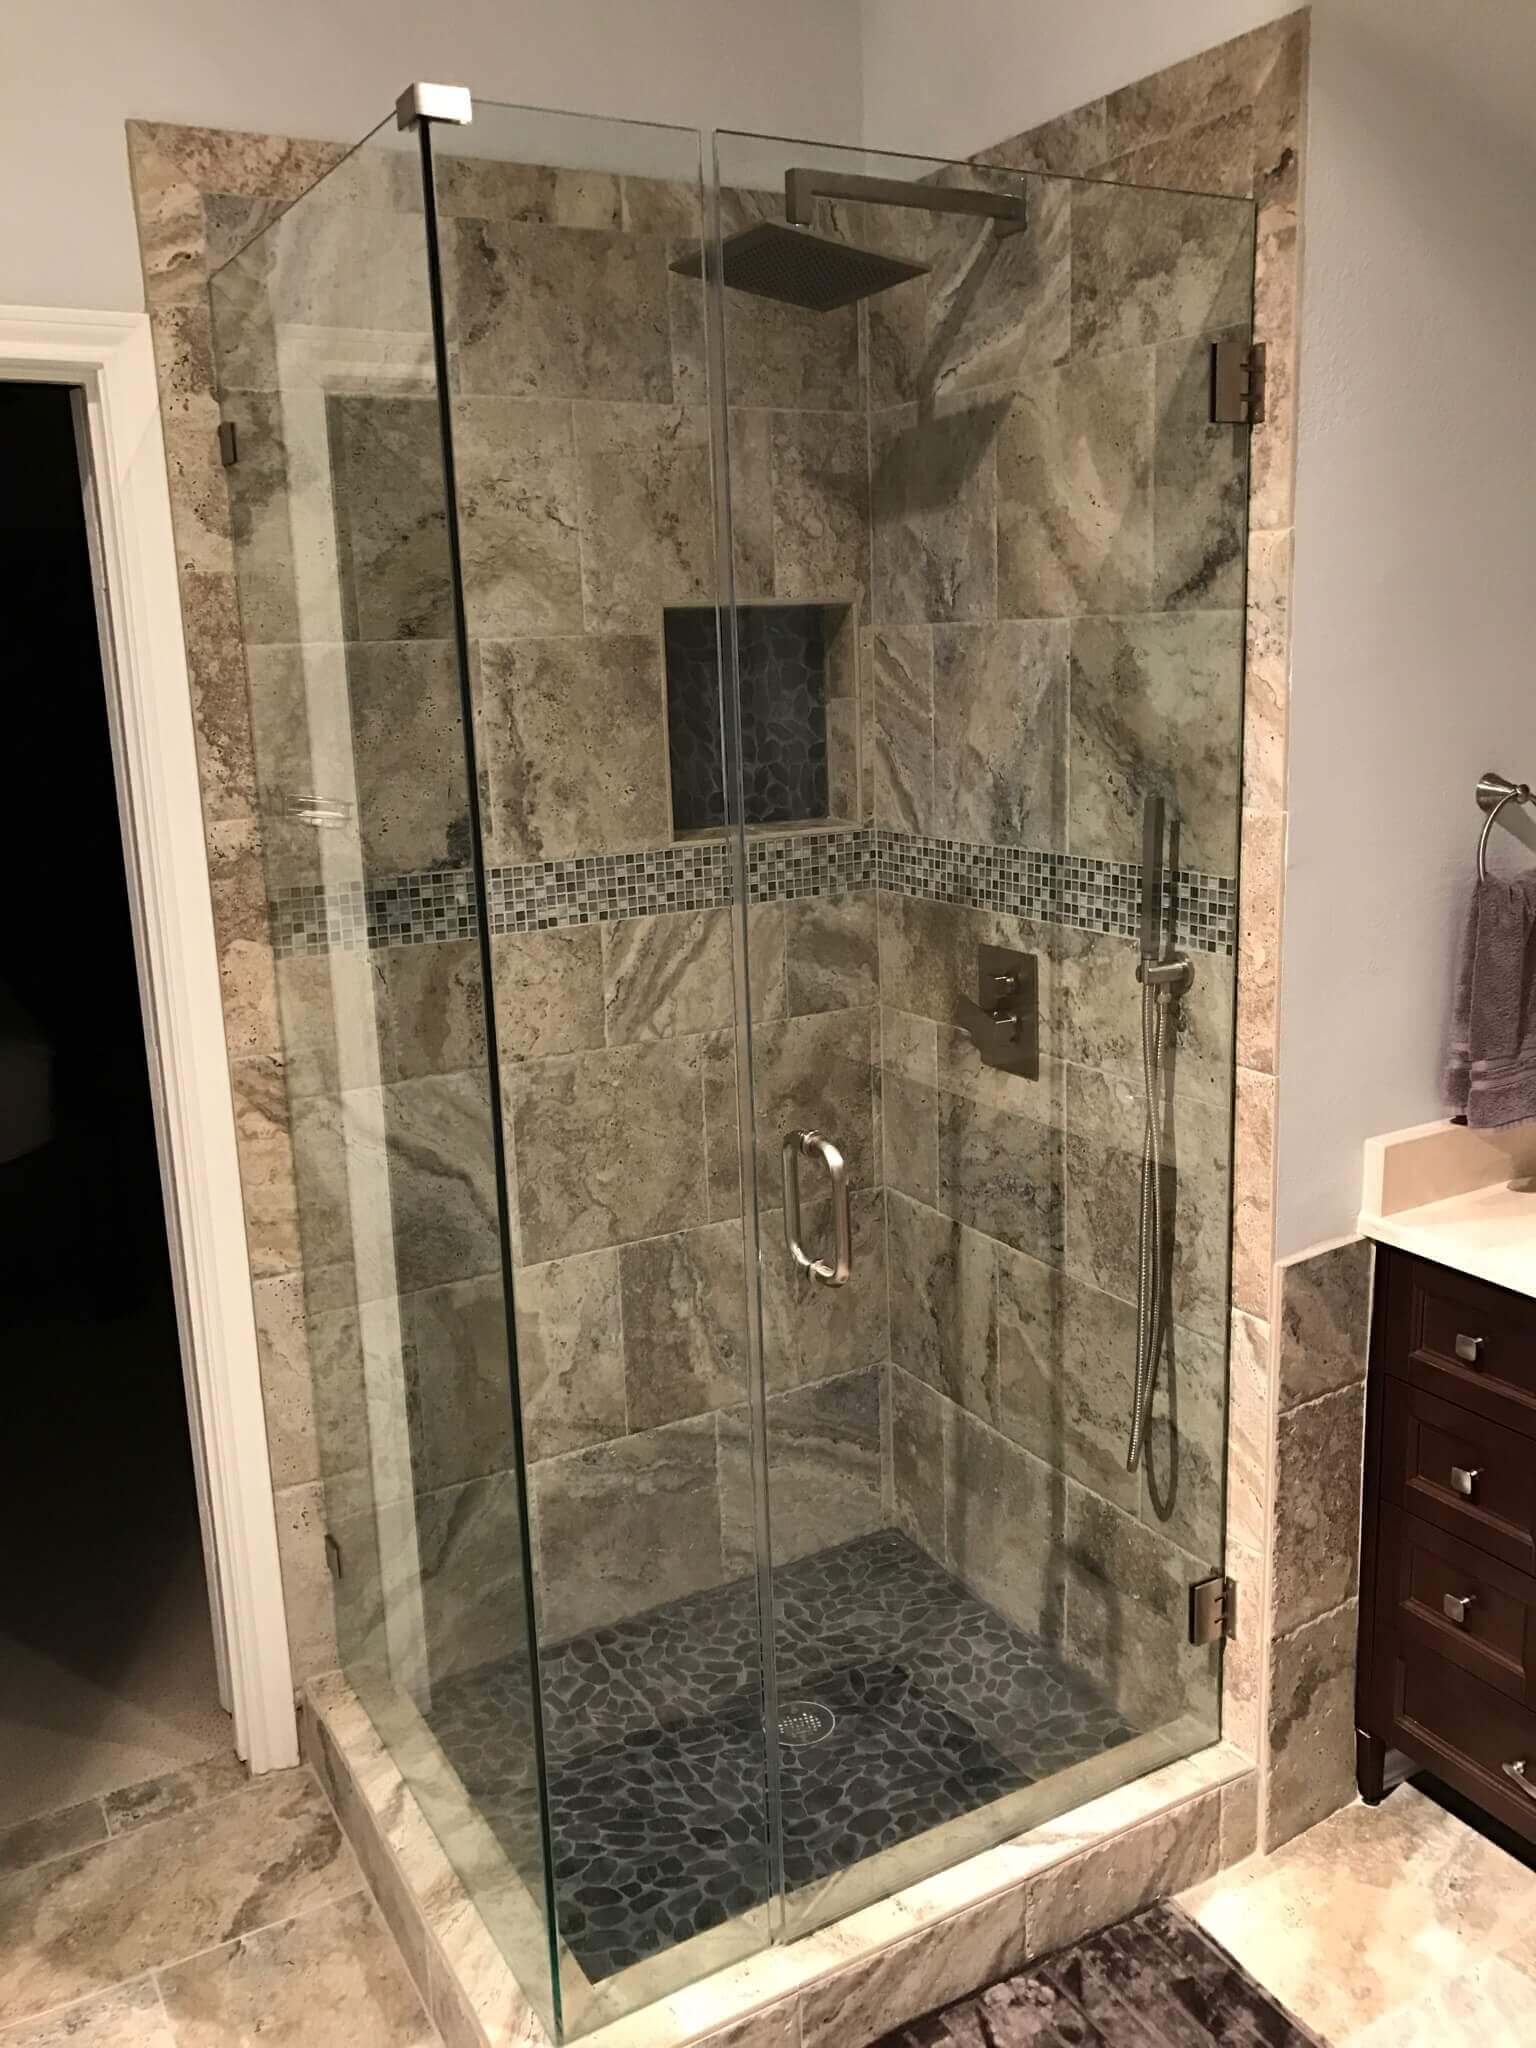
The shower glass portion is usually the very last thing that goes in.
As mentioned earlier, it takes between 7 to 10 days to get the unit ordered, cut and installed. Yes, you can order pre-made ones, but you better be sure your specifications are exact as the slightest variance can mean leakage.
Ensure you specify what color hardware you want on your unit for things like the handles, hinges, and, if required, the top frame. If you’re doing a standard shower unit, a 3/8th’s thick tempered glass unit is the way to go. Check with your contractor for any options like low iron glass (removes the green tint) or Shower Guard, which permanently seals the glass, so you never get water stains.
95% of units we do are frameless, and if you can do it, I would strongly recommend the same.
Here are three handy tips to keep in mind that I have shared with clients over the years:
1. Don’t spend too much on faucets.
Now that may seem counterproductive for someone who remodels bathrooms to tell you that they are artwork, in all honesty. You are better off shopping for a well-known brand like Delta, Moen, or Kohler rather than go for some hyper exotic brand imported from Germany.
The main reason why I say this is the feedback from plumbers over the years has always been the same – the more expensive it is, the harder it is to get parts for it if something goes wrong. I have had cases where we had to special order a gasket for a leaking faucet, and we waited 2 1/2 weeks for it to arrive from Norway.
Stick with local, well-known brands.
You can browse these brands here.
2. Tile size matters.
The larger the tile, the less grout you have to worry about cleaning.
Now I understand some folks like the smaller, rectangular, subway-type tile, and that’s fine too. I’m just saying if cleaning is an issue for you, then buy larger tiles and install them both in the shower and the floor. It also makes the area look bigger.
3. Stone remnants can help
If you’re doing just a couple of small vanities, you don’t actually need to purchase an entire slab of stone like marble or granite.
Ask your contractor about any remnant pieces they may have at the shop as they often have them and for significantly cheaper than buying an entire new slab. Once you buy the whole slab, it’s best to use it all. Otherwise, the fabricator will sell it off as a remnant, so you may as well use it!

FAQ’s:
Q: How long does the process take from start to finish?
A: This will completely depend on several things like the contractor, scope of the job, lead times for subcontractors, and many other factors. If you are doing more than one bathroom, it’s always a good idea to do one at a time, so you have one always working. It could take anywhere between a few days for a small powder room to a couple of months and beyond for larger jobs.
Q: When do I buy my fixtures and faucets?
A: You’re going to make life a whole lot easier for everyone if you have everything at the house before the job starts. This is because plumbing is one of the first things that needs to be done after the demolition. If you do not have your valve and other required plumbing parts, the contractor will be unnecessarily delayed. You end up having a torn-out bathroom sitting there, and nothing gets done. Having everything there, though, sees you having your bathroom completed sooner.
Q: Where do I buy them from?
A: Make sure you check out the best shower faucets and tub faucets here first.
If you don’t find anything there, you can always get them from your local hardware store like Home Depot.
The main advantage with specialty stores is the sheer selection you have compared to a Lowe’s or Home Depot.
However, if you’re not fussed about fixtures and faucets, your local store works fine.
Keep in mind, if you’re buying online; make sure you buy everything at once, so you don’t incur separate shipping charges. Most stores will waive the shipping charge if your purchase is large enough.
Conclusion
This is a general guide to what takes place in a typical bathroom remodel. I hope the pictures and video helped this overview to really clarify everything.
Of course, there are variances between projects which may extend or shorten completion times. Replacing cabinetry, for example, could take many weeks alone, so be mindful of this before tearing everything out.
Be sure to find someone experienced and competent at bathroom remodels, and whatever you do, never go for the lowest price.
Please check out my article here to help you sniff out scammers.
I hope this has been helpful to you and if you’re in the Dallas area and need some help with your bathroom, drop me a line.
All the best!
Our installers are dedicated to adopting the most up-to-date procedures for a quality floor installation in your house or office.
BOOK APPOINTMENT
Shower and bath remodeling for our everyday comfort.
Invest in your kitchen, the heart of your home
Remodel your floors to another quality level.
The right commercial flooring can make a big difference
Best Dallas Flooring Installation | 100% Labor Guarantee
Proof that we are confident in our services and that you should put your trust in us.
Sammer, Jamie and their team were AMAZING! Sammer was very patient helping me find a flooring that I liked. He recommended places to look for flooring and connected me with other great people to find me find this beautiful flooring. Sammer is also very professional and accommmodating. I recomend Sammer Flooring for your flooring needs
Sammer and his team were the absolute best case scenario in today's competitive market. Sammer provided the quote I needed within hours and his team was able to start the same week. His team was prompt, on time, and ensured that they asked questions and did not assume. I would highly recomend them
We had such a good experience with this flooring install! Sammer set excellent expectations about timeline of the project and what is usual dust and noise for such a project- it was a LOT of tile to demo, they taped off the room with plastic really well to limit dust. The install was quick and the grout lines are PERFECT. I a a local interior designer so my standards were really high. That Being said, we went with Sammer because his crew did such a perfect job on my neighbor's master bathroom. We will absolutely be working with him at our home again! I have since used him for several of my own clients- and the work is stunning